Broiled Sake Kama with Chive Cauliflower Rice, Miso-Butter Spring Vegetables and Wakame Salad
Salmon collars broil until the skin blisters and the rich meat pulls cleanly from the bone, with chive-studded cauliflower rice underneath to catch the juices. Sweet snap peas and asparagus get a glossy mushroom-miso butter finish, while a cool sesame-wakame salad brings the acidity and briny contrast.
By Jonathan Katzman · Cooked and photographed · Recipe updated
Serves: 4 servings
Tags: gluten-free, nut-free, pescatarian
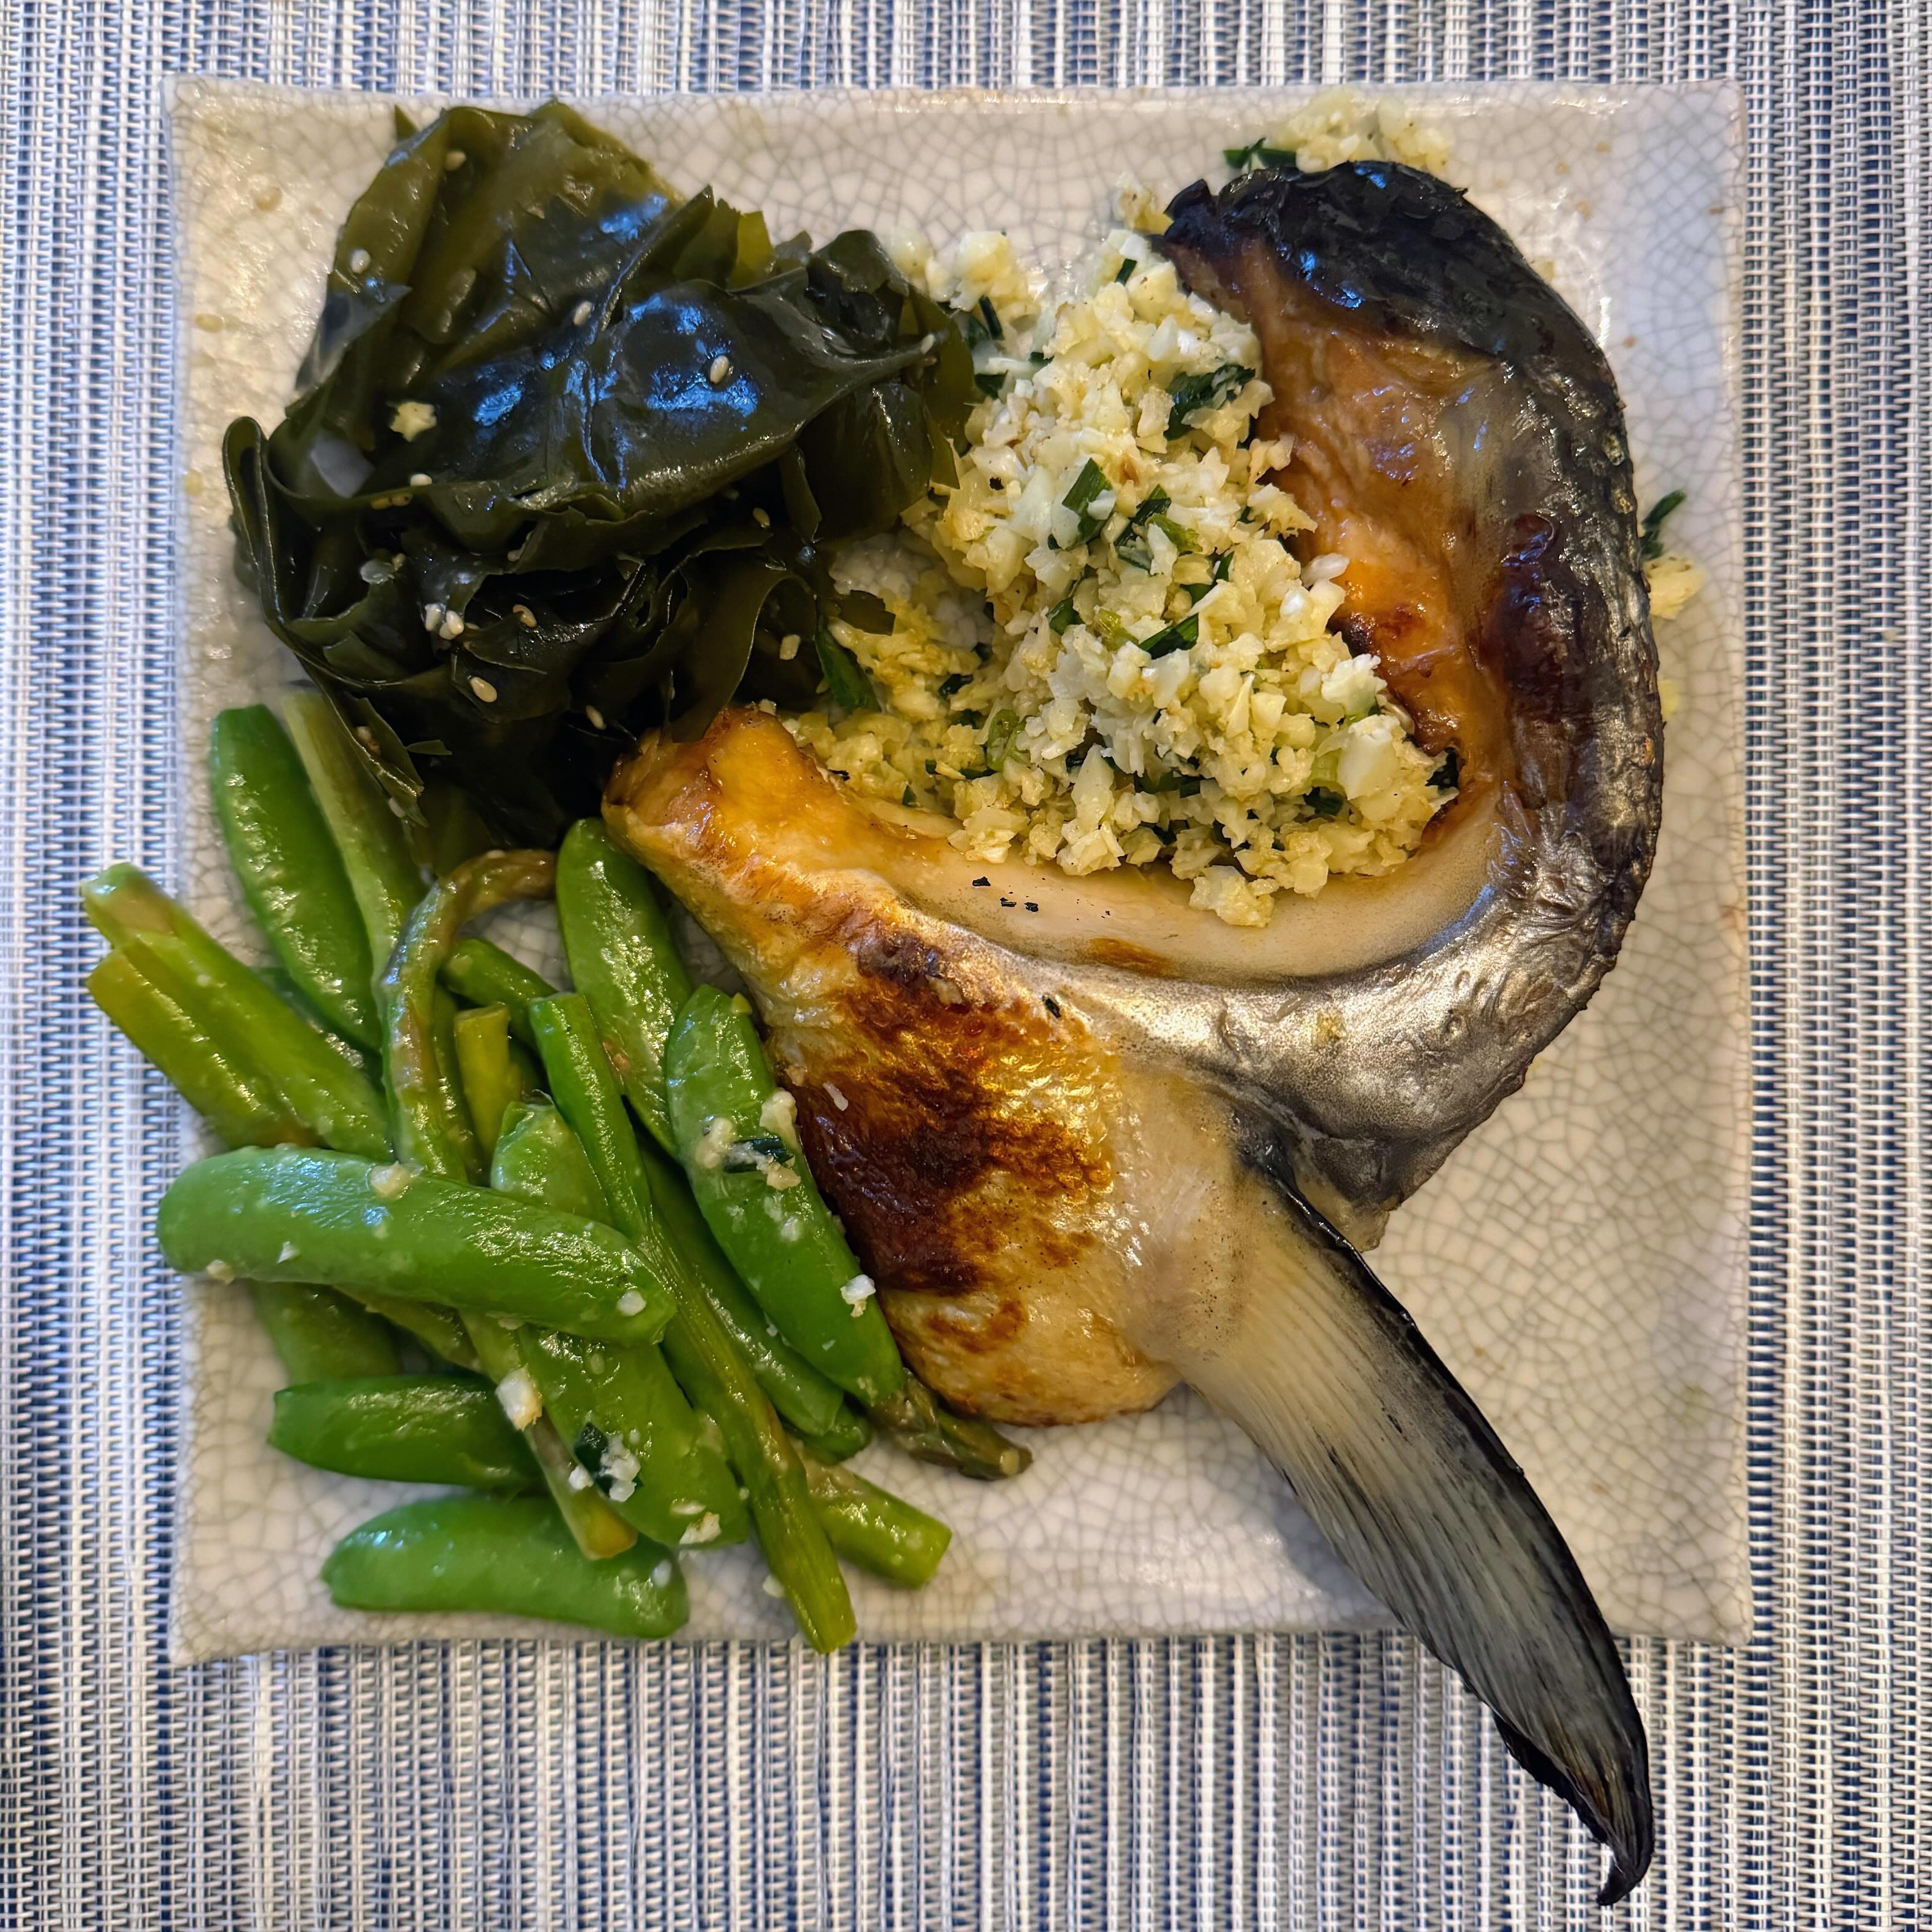
Broiled Salmon Collars
Collars have enough fat and connective tissue to stay succulent under a hot broiler. Drying and salting the surface encourages browning without needing a sugary glaze.
Ingredients
- 4 large salmon collars, about 3–4 lb total, cleaned and scaled
- 1 1/2 tsp fine sea salt, or approximately 0.6% of the collars' weight
- 2 tsp avocado oil
Instructions
- If frozen, thaw the collars completely in the refrigerator on a rimmed tray, usually 24–36 hours. Remove any remaining scales or gill fragments and pat thoroughly dry.
- Season the collars evenly with salt and refrigerate uncovered for 20 minutes. Blot away surface moisture before cooking.
- Heat the broiler on high with a rack about 7–8 inches below the element. Line a sturdy broiler-safe sheet pan with foil, not parchment, and lightly brush the foil and collars with avocado oil.
- Arrange the collars in one layer with the fleshy cut surfaces facing upward. Broil for 7–10 minutes, rotating the pan as needed, until the exposed flesh is golden.
- Turn carefully with tongs and a spatula to expose the skin to the heat. Broil another 4–8 minutes, until blistered and browned. Check the thickest pocket of meat away from bone with an instant-read thermometer; it should reach 145°F and separate easily from the bone.
- If the exterior darkens before the center is cooked, move the pan lower and finish at 400°F. Rest for 3 minutes before serving.
Notes
- Collar size and broiler strength vary considerably; temperature and easy separation from the bone are more reliable than the clock.
- Serve one substantial collar per person, or two smaller collars. Eat carefully around the large bones and fin.
Cauliflower Rice with Garlic Chives and Scallions
A wide pan lets cauliflower moisture evaporate so the grains stay distinct. Scallion whites flavor the oil, while garlic chives and scallion greens stay fresh when added near the end.
Ingredients
- 1 large head cauliflower, about 2 lb before trimming
- 1 1/2 tbsp avocado oil
- 4 scallions, thinly sliced, whites and greens separated
- 1/2 cup chopped garlic chives, cut into 1/2-inch lengths
- 1/2 tsp fine sea salt, plus more to taste
Instructions
- Cut the cauliflower into florets and pulse in batches in a food processor until it resembles coarse rice. Stop before it becomes finely minced or wet.
- Heat the avocado oil in a wide skillet over medium-high heat. Add the scallion whites and stir for 30 seconds.
- Add the cauliflower and salt. Cook uncovered for 7–10 minutes, stirring occasionally, until tender but still granular and the pan is no longer releasing much steam. Use two batches if the pan is crowded.
- Fold in the garlic chives and scallion greens for the final minute. Taste for salt and keep warm briefly, uncovered or loosely covered so it does not steam.
Notes
- If using frozen cauliflower rice, cook directly from frozen and allow a few extra minutes for moisture to evaporate.
Sugar Snap Peas and Asparagus with Matsutake Miso Butter
Brief blanching preserves the spring vegetables' sweetness and snap. Adding miso butter off heat creates a glossy coating without scorching the miso or separating the butter.
Ingredients
- 12 oz sugar snap peas, strings removed
- 1 lb asparagus, woody ends removed, stalks cut into 2–3-inch pieces
- 3 tbsp unsalted butter, softened
- 1 tbsp gluten-free Shared Cultures matsutake mushroom miso, or another gluten-free mushroom miso
- 1 tsp fresh lemon juice
- 2 tbsp reserved vegetable blanching water, as needed
- to taste salt for blanching water
Instructions
- Mash the softened butter and miso together until evenly blended.
- Bring a pot of lightly salted water to a boil. Add the asparagus and cook for 1–2 minutes, depending on thickness. Add the snap peas and cook for another 60–90 seconds, until both vegetables are vivid green and crisp-tender.
- Reserve a little blanching water, then drain the vegetables thoroughly. If preparing ahead, chill immediately in ice water, drain and dry well.
- Return the vegetables to the warm, drained pot over low heat with 1 tablespoon of reserved water. Toss just until hot, then remove from the heat.
- Add the miso butter and toss until it melts into a thin, glossy coating. Add another splash of warm water if needed to loosen it. Finish with lemon juice and taste before adding any more salt.
Notes
- Miso salinity varies; begin with 2 teaspoons if yours is particularly salty, then add more to taste.
- Keep the pot off direct heat while incorporating the butter. If the coating looks oily, toss in a teaspoon of warm water.
Sesame Wakame Salad
Broad wakame ribbons offer a cool, slippery contrast to the hot fish and vegetables. Rice vinegar cuts the salmon's richness, while a restrained amount of sesame oil rounds out the seaweed's briny flavor.
Ingredients
- 3/4 oz dried wakame, preferably broad-leaf rather than finely shredded
- 1 1/2 tbsp unseasoned rice vinegar
- 2 tsp gluten-free tamari
- 2 tsp toasted sesame oil
- 1 tsp honey
- 1/2 tsp finely grated fresh ginger
- 2 tsp toasted white sesame seeds
Instructions
- Soak the wakame in a large bowl of cool water according to its package directions, usually 5–10 minutes, until fully expanded and tender.
- Drain, rinse and gently squeeze out excess water. Cut large leaves into wide, bite-size ribbons, removing any tough central ribs.
- Whisk the rice vinegar, tamari, sesame oil, honey and ginger together until the honey dissolves.
- Toss the wakame with the dressing and sesame seeds. Let stand for 5 minutes, then taste; add a little more vinegar if it needs brightness. Refrigerate until serving.
Notes
- Wakame expands substantially. Aim for approximately 2–3 cups after hydration, and dress lightly so the salad is glossy rather than swimming in liquid.
Overall Timing / Workflow
The salad and miso butter can wait, leaving only quick vegetable cooking and broiling for the final stretch.
Instructions
- The day before: thaw frozen collars in the refrigerator on a rimmed tray.
- 0:00 — Dry and salt the collars. Soak the wakame, soften the butter and set a pot of water on the stove.
- 0:10 — Dress and chill the wakame. Mix the miso butter, trim the green vegetables and rice the cauliflower.
- 0:20 — Preheat the broiler and start the cauliflower rice.
- 0:25 — Put the collars under the broiler. Finish the cauliflower rice and keep it warm briefly.
- 0:32 — Turn the collars when browned. Blanch and drain the asparagus and snap peas.
- 0:38 — Check the fish for doneness. While it rests, finish the vegetables with miso butter and lemon, then plate.
Notes
- Allow extra time for very large collars. Keep the vegetables undressed until the fish is nearly ready.
Plating
Tucking the cauliflower rice into the collar's curve catches the juices while keeping the cool salad distinct from the hot components.
Instructions
- Spoon cauliflower rice into the center-right of each large plate.
- Set a salmon collar partly over and around the rice, with its browned skin and flesh visible.
- Arrange the miso-butter asparagus and snap peas alongside, spooning any remaining coating over the vegetables.
- Place a compact mound of wakame salad at the opposite side of the plate, draining off excess dressing first. Serve immediately with a small dish for bones.
Leftover Path
Picking the fish while it is still easy to handle makes leftovers practical, and separate storage preserves the salad's cool texture.
Instructions
- Carefully remove leftover salmon meat from the collars, checking for bones. Refrigerate the fish, cauliflower rice, vegetables and wakame separately within 2 hours.
- Use the salmon, cauliflower rice and vegetables within 3 days; use the dressed wakame within 2 days for its best texture.
- Reheat the cauliflower rice and green vegetables in a covered skillet with a small splash of water. Fold in the salmon at the end and heat leftovers to 165°F, or serve the properly chilled salmon cold.
- Make a next-day lunch bowl with warm chive cauliflower rice, flaked salmon and vegetables, adding the cold wakame only after reheating.